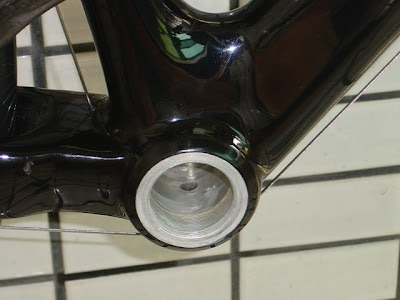
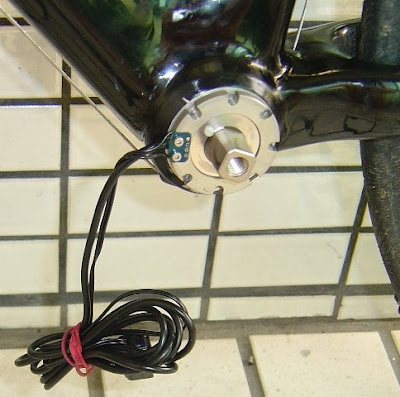
 This would be the BEFORE shot. A little dirty from riding in the rain but not too bad.
 The basic tools needed. Not shown are the taping and facing tools in my shop, at work. Also grease. Oh yeah, that BB tool sitting there, it's the wrong one. I found that out a few seconds after snapping this picture when I tried to remove the Campagnolo BB. I had the Shimano tool. The other tool is the tool that comes with the Ergomo. More on that later. That'd be frame polish in the spray can. Finishline to be exact.
 OK. Cleaned and all shiny, shiny. Whenever I remove my cranks, I have a good look at the BB area. I clean it and put a heavy layer of polish on it.
I skipped the tap and face as I'd just done it a month ago when I put in a new Campagnolo BB. I'm sure it's still fine (...more on that later).
I scrubbed the threads with a stiff brush. Degreased, then added an even film of FinishLine grease over the threads and the shell face. Yum.
 I installed the drive side cup hand tight (lip snug to the BB face by hand). I added the same even layer of grease where the BB will seat in the cup. There's the grease.
 The destruction manual is pretty clear on 1 point; The wires need to be at the 9'0clock position for the Ergomo to be most accurate. To do this, you really need to face and chase the shell. The Ergomo comes with 3 different width spacers and it is a trial and error procedure to discover which ones you need to use. I guess you could mic everything but you'd probably have to install it, at least twice, to be sure.
The good new is that the torque spec for the cups is quite broad. This allows you to cheat a little bit. All that grease I put on previously came in pretty handy here. This was also a trial and error procedure. I had to alternate between torquing each cup while trying to have the cable at exactly 9'oclock as the torque fell into range.
It all seemed like a great plan, so far.
 This is the tool that came with the Ergomo. It has a tooth missing so that you don't damage the cables during installation. It was cut well, feels like good quality tool steel and fit solidly in place and felt solid during use. Which is a good thing because I had to use it quite a bit and I am far from done using it.
 Here's the latest incarnation of my bike - I've gotta lose the flames. The whole Ergomo set-up is quite unobtrusive. I hate zip ties on my bike but these are minimal.
The beauty shot. I think the water is kinda sexy. I was going to take a shot of the front of my bike coming out of the pool, dripping wet, but they were cleaning the pool today so this was my second choice.
Install to date:
Chase and face is a must. It's a trial and error install. I'm 1.5 hours into it, so far.
I went for a ride to test the system afterwards. It worked fine. If I had actually read the computer set-up destructions, I would have gotten the speed sensor working properly. Other than that, and not setting up the altimeter at all, they system worked and felt smooth.
The bad part. Technically, I got the cups into the lower range of their torque spec. Over the course of my ride, however, the cups moved. This means the data I recorded may be inaccurate. To what degree, I don't now.
I worked with the spacers and have come to the conclusion that I have to both add 1 more (there are different thicknesses) and face the shell again, thereby removing the tiniest amount of material. I'm positive that this will do the trick.
Without access to cutting tools, I could not have installed the Ergomo system at home. In short, a proper shop must be involved in the process. Factor these costs into the overall cost of the Ergomo PM.
I will follow on with an update on the installation and then it is on to the computer itself. There is some pretty cool stuff there.


No comments:
Post a Comment